|
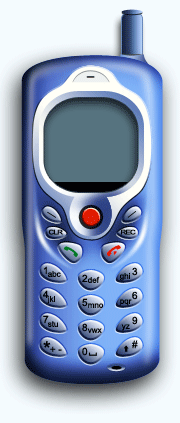
Realistic Mobile Phone
Hi Friends
I am here with a fantastic and creative tutorial that is mobile graphic and very excited to share it with you; You are going to learn how to create realistic mobile graphic in photoshop. It has been described by some simple step these are given in this example, you will learn more about layer styles, Brush and Pen Tool. You have to follow these entire steps to reach on the final result and hope you like and enjoy.
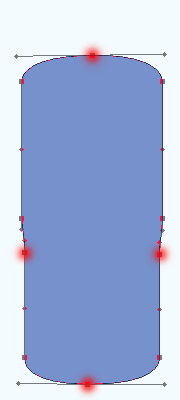
Start with a new document and control size and background as you need, select Rounded Rectangle Tool (U key) and draw on the document with "#7691cb" foreground color. Select Add anchor point tool and apply in the middle of each side to add some more anchor point then select Direct Selection Tool (A key) and modify the anchor position as showing Red color.
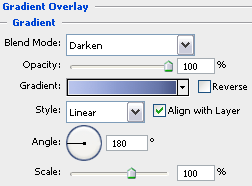
Still selected mobile shape apply gradient color, follow this path (Layer menu > Layer Style > Gradient Overlay) a window come on the screen and click on gradient drop down then choose color as done below.
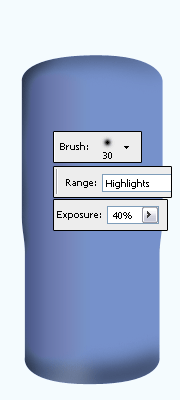
You have to make mobile shape selection so hold Ctrl + mouse click on the layer thumb, select Burn Tool (O key) and make setting in the option bar then apply on the mobile as showing dark spots.
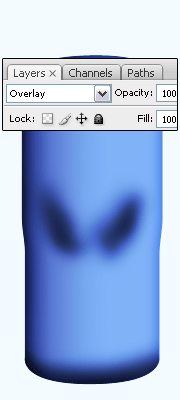
Now I am going to apply a different color look of mobile, make duplicate layer by pressing Ctrl + J key and change the layer's blending mode "Normal" to "Overlay". Select Burn Tool (O key) and apply in the middle of the phone with same upper brush settings as done below.
Select Pen Tool (P key) and draw a curl line with any color because I an going to apply gradient, follow this path (Layer menu > Layer Style > Gradient Overlay). Click on the gradient and choose different color on the sliders in the opened window.
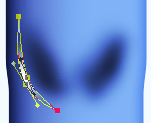
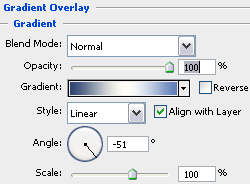
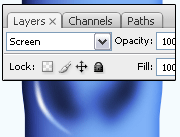
In this step apply blur effect, right click on the layer and choose "Rasterize Layer" then follow this path (Filter menu > Blur > Gaussian Blur) and set radius "1.1". Now change the blending mode "Normal" to "Screen".
In this step I am going to draw screen of the mobile, select Pen Tool (P key) and draw a screen shape by making some anchor point with any color as given below picture.
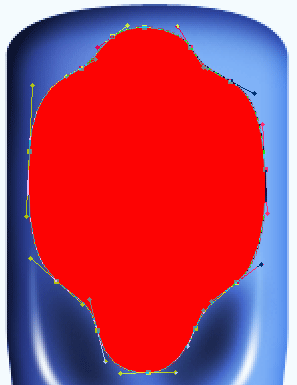
Now apply gradient color in the shape, still selected screen layer follow this path (Layer menu > Layer Style > Gradient Overlay). Click on the gradient and choose different color in the sliders and make another setting.
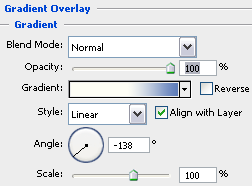
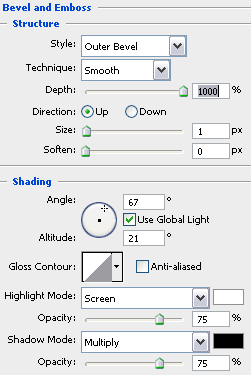
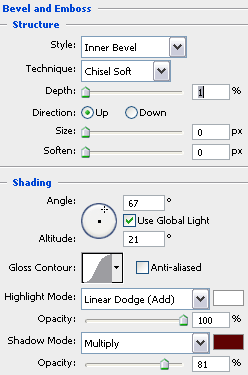
In this step I going to apply bevel, follow this path (Layer menu > Layer Style > Bevel and Emboss). A window come on the screen and makes all these settings as done below picture.
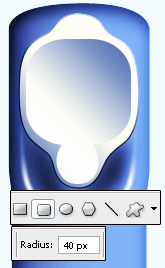
Select Rounded Rectangle Tool (U key) and make settings in the option bar then draw in the middle of the screen. Now select Ellipse Tool (U key) and click on the "Add Shape Area" button in the option bar then draw on the bottom of the rounded shape and apply same gradient color as up but make sure the angle should be apposite.
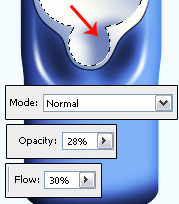
Hold Ctrl + mouse click on the layer thumb to make selection, select Brush Tool (B key) with "#2f4082" and make settings in option bar then apply as showing by Red Arrow.
In this step I am going to draw button inside the circle, select Ellipse Tool (U key) and draw a circle with hold Shift key then follow this path (Layer menu > Layer Style > Bevel and Emboss). A window come on the screen and change color then make another settings as done below picture.
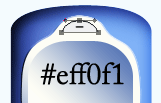
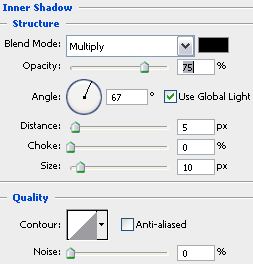
Now draw head phone, select Pen Tool (P key) and draw a half circle with "#eff0f1" color. Select Rounded Rectangle Tool (U key) and draw in the middle of the screen with same settings as done in 10th step then follow this path (Layer menu > Layer Style > Inner Shadow) choose color and make settings as done below.
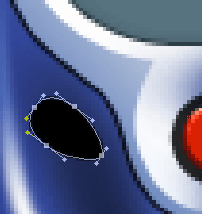
In this step I am going to draw button, select Pen Tool (P key) and draw oval shape with any color. If your drawn shape is not perfect you can take help of the Direct Selection Tool (A key) to make it corect.
Apply bevel effect on the button, follow this path (Layer menu > Layer Style > Bevel and Emboss). A window come on the screen and makes all the settings as here.
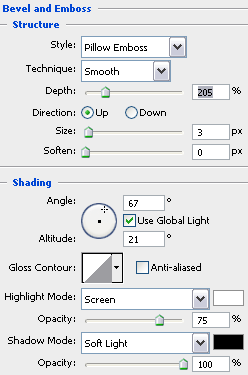
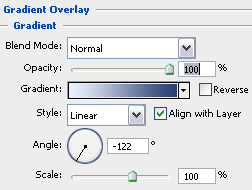
Finally apply gradient color, follow this path (Layer menu > Layer Style > Gradient Overlay). Click on the gradient and choose different color then make another setting as done below picture.
Make Duplicate buttons and put on the right place then apply symbol and type text by (T key). Now draw mike, select Ellipse Tool (U key) and draw oval shape on the bottom and apply gradient, make duplicate and reduce size then apply Black color as below.
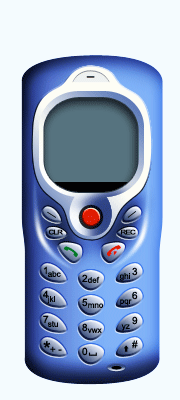
I think you are perfect now so I am giving you a work, you have to draw antenna yourself.
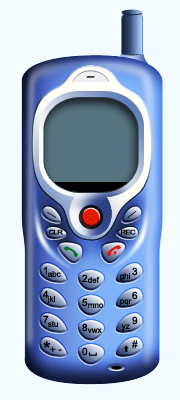
Apply shadow that is final result.
Santosh Kumar
This is santosh kumar living in New Delhi (India) and love to work as a Web & Graphic Designing. I like to create sketch, background, illustration and vector graphics. Tutorialbunch.com is a very good place where I express my creativity.
|