|
Create beautiful white Pearl
I have bring an example of beatiful white pearl graphic tutorial in photoshop, you will learn how to create a pearl in the Photoshop. You will also learn the use of gradient color effect, inner glow and apply shading on the pearl graphic. It is very easy and interesting to make by the use of some simple step.
First we take a new document with any background color as you like and adjust the size of that, Select ellipse tool (U key) and draw a circle on with "#acacac" color and any size but I have mention my circle size.
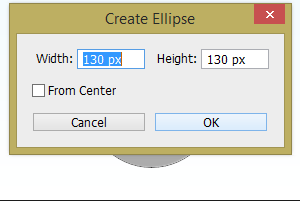
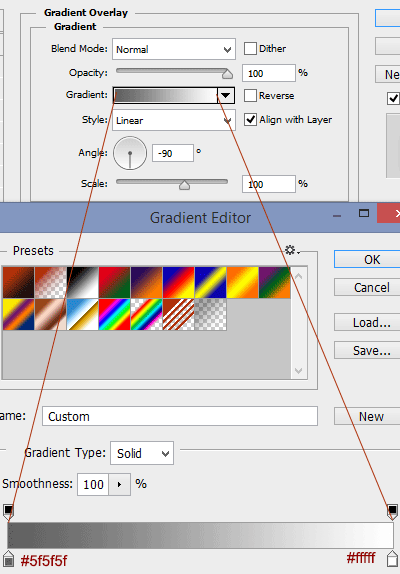
Apply gradient color effect on the circle, select the circle and go to Layer menu > Layer style > Gradient Overlay and apply different shade color on the gradient slider.
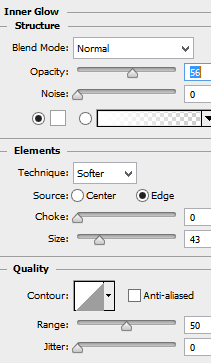
Now apply one more effect that is inner glow, it provides a glowing effect around inside the circle, go to Layer menu > Layer style > Inner glow. Choose color and adjust all these settings as given below picture.
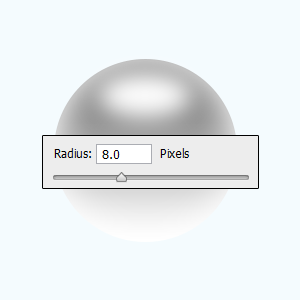
It is time to apply shading on the circle top, select the Ellipse tool and draw an oval shape on the top, go to filter menu > Blur and Gaussian Blur then adjust the radius as mention here.
Come to bottom part of the circle to apply same shading, Copy and paste upper shading and increase the size by pressing Ctrl + T key then adjust the right position.
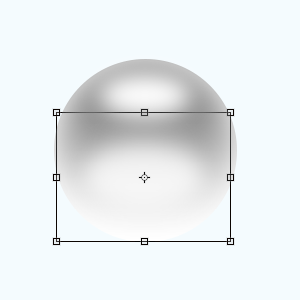
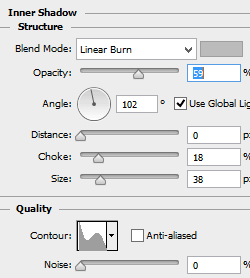
Now apply shadow inside the pearl graphic to make complete, go to Layer menu > Layer Style > Drop Shadow. Choose different color and make all these setting as done below picture.
Now your pearl graphic is completed. I have compied more pearl and applied different color with reduce their size.

Santosh Kumar
This is santosh kumar living in New Delhi (India) and love to work as a Web & Graphic Designing. I like to create sketch, background, illustration and vector graphics. Tutorialbunch.com is a very good place where I express my creativity.
|