|
Wood Texture Piece
In this tutorial we are going to teach you how to create wood texture pieces in the Photoshop cs6, it is quite easy by this example. We have done it by using some effective filter, tools and interested to share with you all. You have to just follow with applied same step, you get the final result.
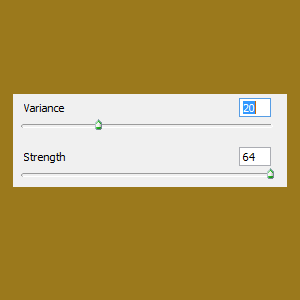
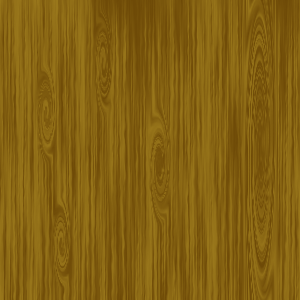
First, you need a new file with "#9b791c" background color, set the foreground color "#825f10" color. The Fibers filter help you to make wood shades, go to Filter menu > Render > Fibers and apply same adjustment.
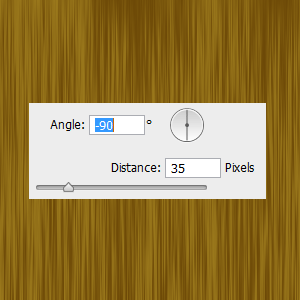
It is not a straight properly so first make it straighten, go to Filter menu > Blur > Motion Blur. A pop up window will come on the screen and you have to change the "Angle" with "Distance" as below picture.
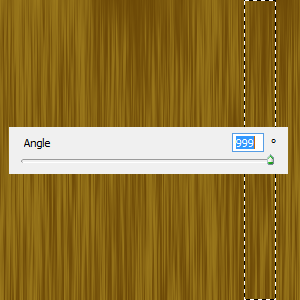
You can see some dark twirl area on the wood; we have to draw it on. Select Rectangular Marquee tool (M key) and make selection on dark area as I have done on the right side, press Ctrl + j key and go to Filter menu > Distort > Twirl and adjust the angle "999o".
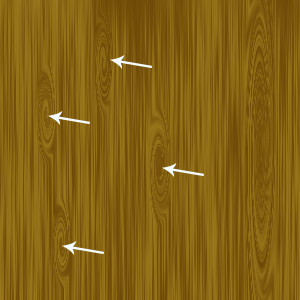
Still selected upper shape press Ctrl + T key and pull it up and down then visible the middle portion on canvas, choose another dark place and apply same filter to make some more wood twirl as showing by White arrow.
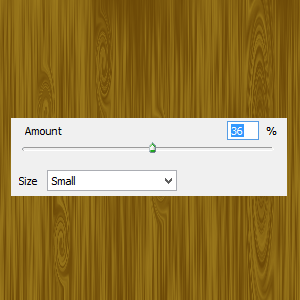
Finally apply one more filter to make realistic, select all the layer and merge them. Go to Filter menu > Distort > Ripple, change the "Amount" and "Size" in the opened window.
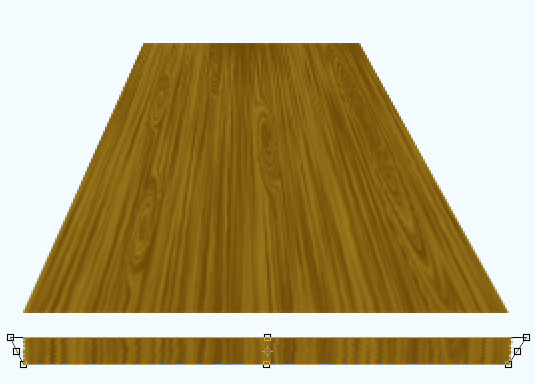
You get the final wood texture picture but my job is still left. I am going to make a wood piece, follow two more step.
Press Ctrl + T key to resize the texture, still transform selection right click and choose "Skew" apply to make same shape. Cut the bottom part and apply "Skew" again to make different shape as done below picture then stick both.
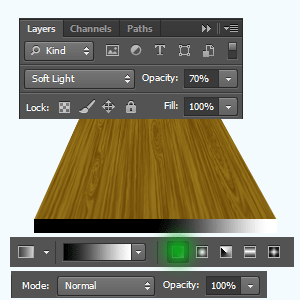
After stick make click on Layer thumbnail with hold Ctrl key to make selection, take a new layer and fill gradient tool horizontally. Change the Layer blend mode "Normal" to "Soft light" with opacity "100%" to "70%". Merge all the layer and apply drop shadow, make two more duplicate with different color shade and apply color background.
This is your final wood texture piece.

Santosh Kumar
This is santosh kumar living in New Delhi (India) and love to work as a Web & Graphic Designing. I like to create sketch, background, illustration and vector graphics. Tutorialbunch.com is a very good place where I express my creativity.
|