|
Running Stripes Inside Text
This example will guide you to create text strip animation in photoshop. You can apply this effect on any simple and designed text. It can be use to showing page load and attractive text on the page.
Start with a new file and adjust the file size as you need,
select Horizontal Type Tool (T key) and adjust text format then type text on the
document with any color as you like.

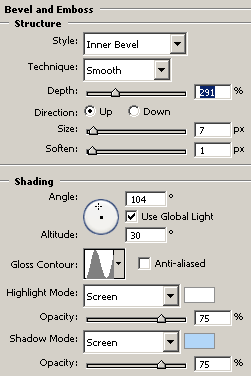
Apply bevel effect on the text, go Layer
menu > Layer style > Bevel and Emboss, change the black color to sky blue and
adjust size with angle and depth.
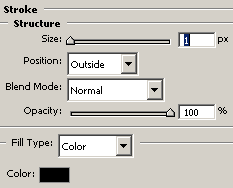
Apply stroke around the text, go Layer menu > Layer style > Stroke and choose color "Black" with size"1px".
You should have this text.

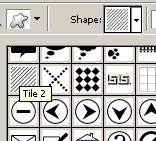
Draw "Tile 2" shape on the document, select Custom
Shape Tool (U key) and choose "Tile 2" and draw on the whole document
with selected black color and give name "Line 1".
Come back to text layer and hold Ctrl + mouse click on the
text layer thumb to make text selection then select "Line 1" layer and
click on the "Add Layer Mask" in the layer palette option.

Now make duplicate layer and click again on the "Add
Layer mask" then move line a little bit right by the mouse and give name "Line 2",
do this step on time more and give name "Line 3".

Now give animation to the lines, open animation Palette and
hide "Line 2" and "Line 3" from the layer, take a new frame
and hide "Line 1" and "Line 3". Do it again on new frame
with changed line layer.
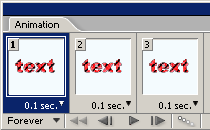
This is the final animated lines inside the text.

Santosh Kumar
This is santosh kumar living in New Delhi (India) and love to work as a Web & Graphic Designing. I like to create sketch, background, illustration and vector graphics. Tutorialbunch.com is a very good place where I express my creativity.
|