|
Magnify Glass
Hi Friends
I am back with a new tutorial that is vector magnifying glass design and interested to share the technique to you which I used to create it. It has been described step by step to understand clearly and easy to apply, let's start.
In the first step you have to take a new document with any size as you required, I have taken file size "Width='400px' ", "Height= '400px' ". Select Ellipse Tool (L key) draw a circle with any color but make sure the stroke color should be block then apply "Extrude and Bevel" by following this path (Effect menu > 3D > Extrude & Bevel) as done below.
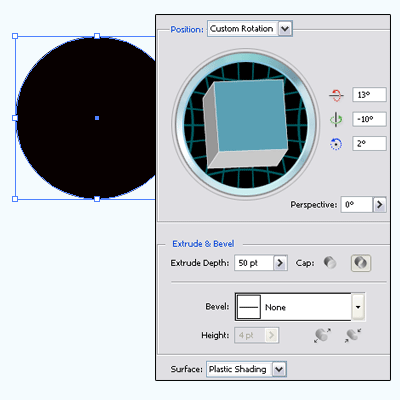
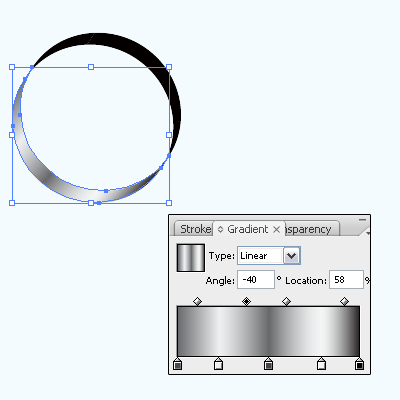
Now you have to make part of the shape so go to "Object" menu and select "Expend Appearance", right click on the shape and choose "Ungroup" option. Select Direct Selection Tool (A key) and select the part then apply gradient as given here.
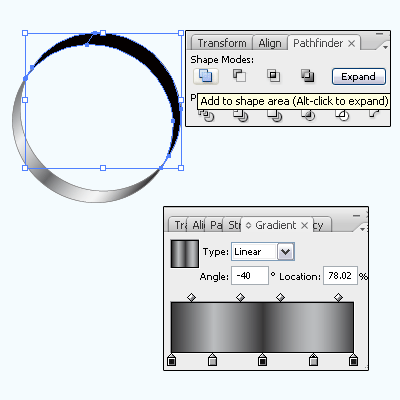
Now come to another side, select part by the direct selection tool. If there are more part, you should make them joint. Select all the part and click on the "Add shape area" in the "Pathfinder Panel", finally click on the "Expand" button then apply gradient (Ctrl + F9) as below.
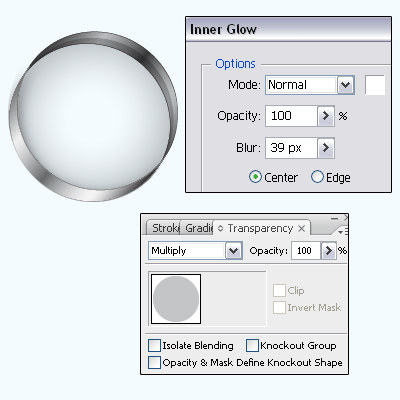
Select Ellipse Tool (L key) and draw a circle with "#C4C5C7" fill color inside, follow this path (Effect menu > Stylize > Inner Glow) and make all the adjustment with different color then change the mode "Normal" to "Multiply" in the Transparency Panel (Shift + Ctrl + F10).
Now I am going to apply some light on the glass, select Pen Tool (P key) and draw a shape by the anchor point with White fill color then apply blur effect by following this path (Effect menu > Blur > Gaussian Blur), put radius "2.9" and do it one time more on another side.
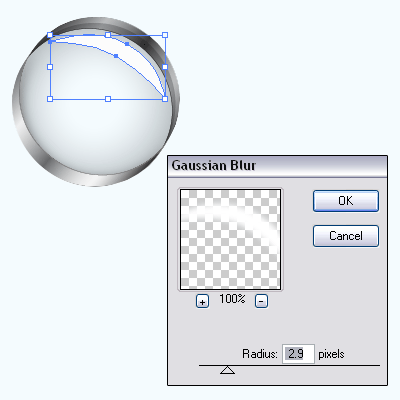
After done the light on the glass adjust the opacity as suitable, I have reduce the opacity "100%" to "41%" in the Transparency Panel (Shift + Ctrl + F10).
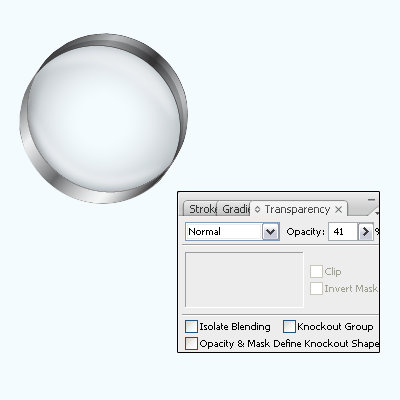
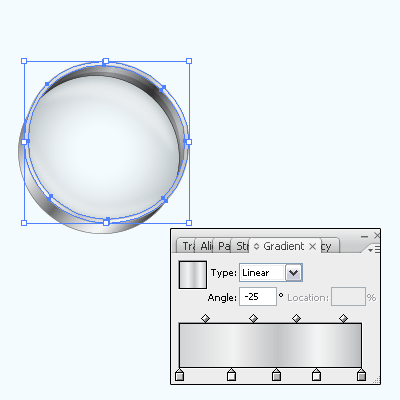
Select thick circle line on the 3d by the Selection tool (V key) then block the fill color and set stroke size "6", select Ellipse Tool (L key) and draw a circle as cover the magnify glass then expand the circle's stroke by go to Object menu > Expand and apply gradient (Ctrl + F9), take new slider and put different color as done below.
let's draw handle now, select Rectangle Tool (M key) and draw little rectangle shape then apply gradient, open Gradient Panel (Ctrl + F9) and put black and white color on the sliders as done below.
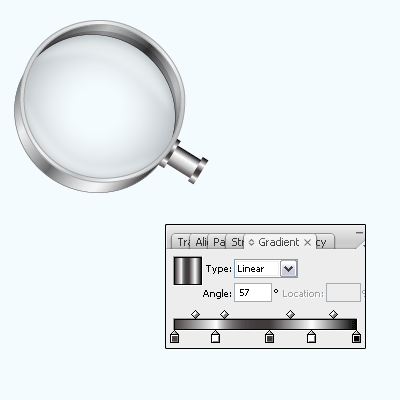
Now draw handle, select Rounded Rectangle Tool and draw then press ( Ctrl + [ ) to send back and adjust the position. Open Gradient Panel (Ctrl + F9) and apply colors in the sliders as done below.
It is your work to apply shadow on whole picture that is the final result.

Santosh Kumar
This is santosh kumar living in New Delhi (India) and love to work as a Web & Graphic Designing. I like to create sketch, background, illustration and vector graphics. Tutorialbunch.com is a very good place where I express my creativity.
|