|
3d Bluetooth Portable Speaker
Let's start learning a stunning vector design that is 3d bluetooth portable speaker in illustrator. I am going to describe whole process to make it easily by using some effective tools. You will lean about Pen tool, brush, 3D effect, color selection, Mesh effect and more.
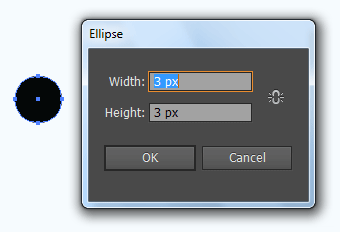
Open a new document and fill size as you required, select Ellipse Tool (L key) and create a little circle with black color and block the stroke.
Make duplicate, select Selection Tool (V key) and move right side with hold "Alt" key.
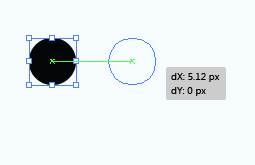
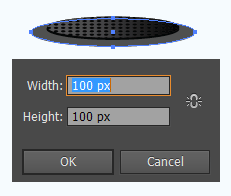
Press Ctrl + C, Ctrl + F and Ctrl + D until the complete horizontal dot line, Select all the little circle with hold "Shift" key and move down on same "dx: 0px", "dy: 5.12px". You get a Rectangle dotted net, select all and make group.
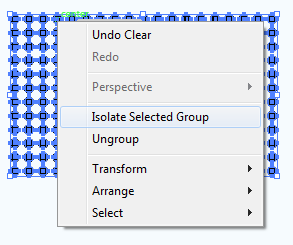
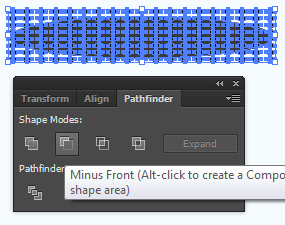
Select Ellipse Tool and create a oval shape then press Ctrl + C and Ctrl + F to make duplicate on same place, select dotted net and pull down on oval shape then select both (dotted net and one oval shape) and press "Minus Front" in the pathfinder panel.
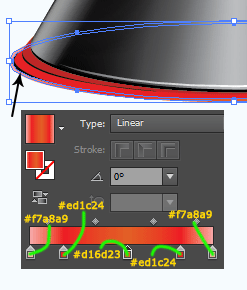
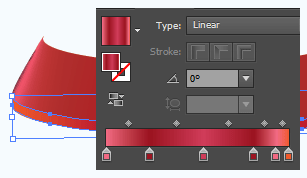
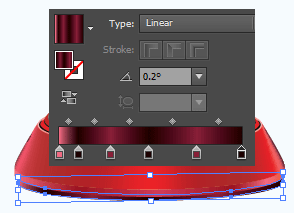
Press Ctrl + f9 to open Gradient pannel and apply different color on the slider.
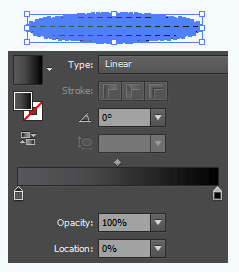
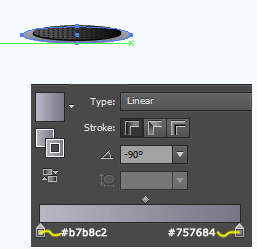
Select Ellipse Tool and create an oval shape with any color but make sure the stroke should be block. Open Gradient pannel and pick a different color on the slider these color are mention with changed angle.
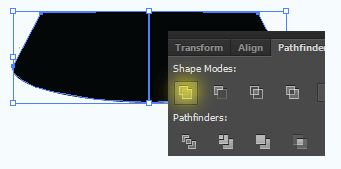
Select Pen Tool (P key) and create this type of shape with any color.
Make duplicate shape with hold alt key and move a little bit by using selection tool, right click and choose Transform > Reflect then click on "Vertical" option.

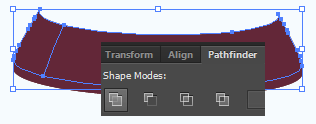
Select both shape with hold shift key and open Pathfinder Panel (Ctrl + Shift + F9), Click on the "Unite" shape mode button as showing yellow spot.
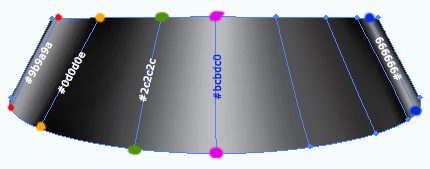
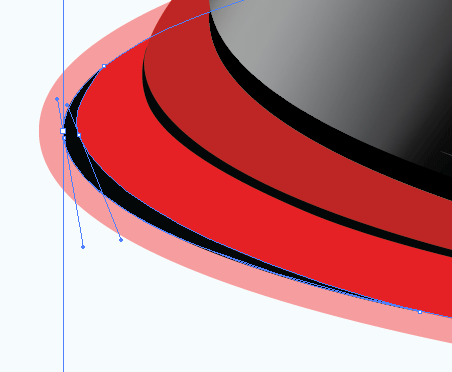
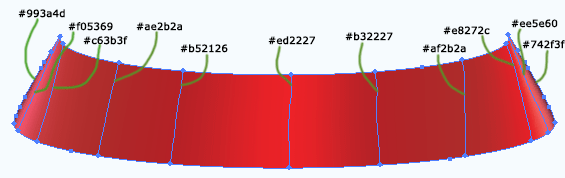
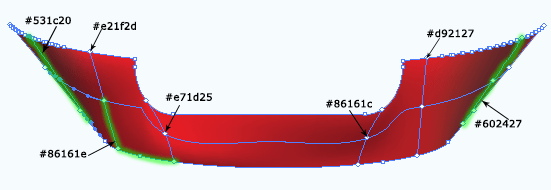
Select Mesh Tool (U key) and click on various positions on the shape then adjust anchor points as strait by using Direction Selection tool (A key). Select one meshed line's anchor point with direct selection tool and apply color. Apply same step on another lines, I have mentioned the color code on the line.
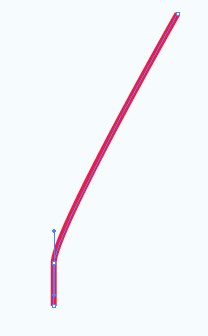
Select Pen Tool and create a line with only fill color "White" on the bottom of the shape, open Brush Panel (F5) and apply below mentioned brush but make sure the curl line should be selected.
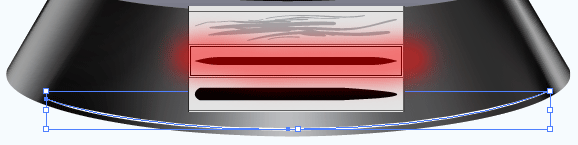
In the step you have to make shadow of the shape, select whole shape and make duplicate and changed color black then send back by pressing (Ctrl + Shift + {). Select ellipse tool and create an oval shape with "#be2626" color then send back. Select Pen tool and draw a curl line shadow, apply this on another side of this shape.
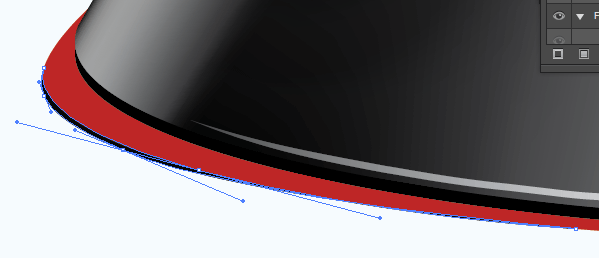
Apply same upper step to make another one but it should have different fill color "#e62125" and stroke color "#f69e9f".
Select last oval shape and go to Object menu > Expand then ungroup, select stroke and apply different color on the slider in the gradient panel.
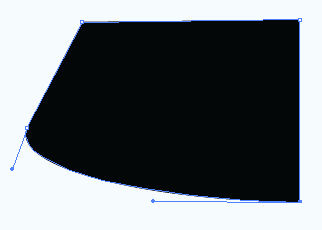
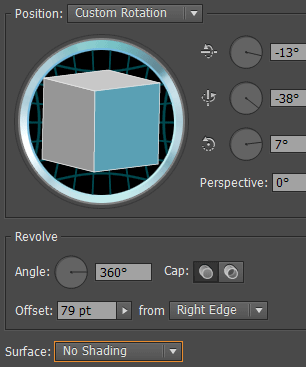
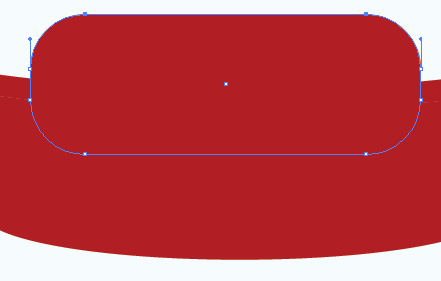
Select Pen Tool and draw this type line with block fill color, go to Object menu > 3D > Revolve and adjust all the settings as given below.
Select 3D shape and make ungroup to remove unused portion, select upper portion and press Del key.
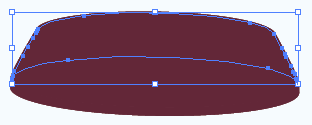
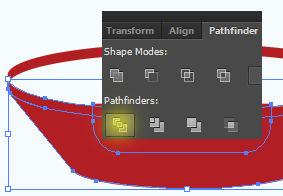
Select every sector in the middle portion and make them joint by click on the "Unite" button in the Pathfinder Panel. Apply also this step on the bottom portion.
Apply Mesh tool and different color on as done upper step, I have given different color code for separate mesh line.
Come to bottom part, open Gradient panel and apply different color on the slider.
Select pen tool and draw a shape bottom to show inner part of speaker, apply gradient color with changed angle.
Use upper step to draw bottom bowl and removed unused portion, select Rounded Rectangle tool and draw in the middle of the bowl. Select upper anchor point by using Direct Selection tool and press Del key.
Select the entire segment with hold key and press "Divide" button in the Pathfinder Panel as showing yellow spot.
Select middle cut area and applies gradient color and Outer glow.

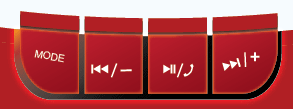
Select middle cut portion and make duplicate and reduce the size then apply upper 21 step to cut as separate button shape, it is your work to draw multimedia symbol.
In this step you have to give more attention to apply mesh tool and color on, I have mention color codes and anchor points where you have to work carefully.
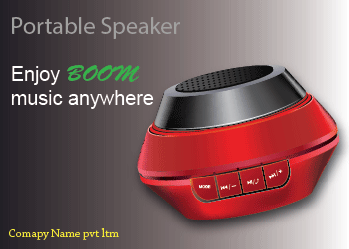
You will have final result and stick it on any banner.
Santosh Kumar
This is santosh kumar living in New Delhi (India) and love to work as a Web & Graphic Designing. I like to create sketch, background, illustration and vector graphics. Tutorialbunch.com is a very good place where I express my creativity.
|