|
Paint Brush Icon
This is a paint brush icon tutorial in illustrator and want to share with you, you will be able to create your own brush icon for your project. It will be created with the help of Pen tool, mesh and gradient color.
Start with a new document with appropriate size as you required, select a Ellipse tool (L key) and draw oval shape with only fill color "Black". First we draw it straight on "0o" position.

Make mesh path for apply different color on, select Mesh tool (U key) and click in the top middle point of the shape then two more on both side (left and right) as the picture given below, maintain same distance in between these anchor points.
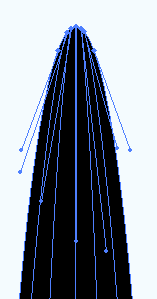
Now we have full length path of the oval shape and we have to apply different color on separate anchor points. Select first anchor point of the left side by Direct Selection tool (A key) and choose "#7c7c7c" code in the color picker popup. Apply same process on the left anchor point; the different color code has been given below.
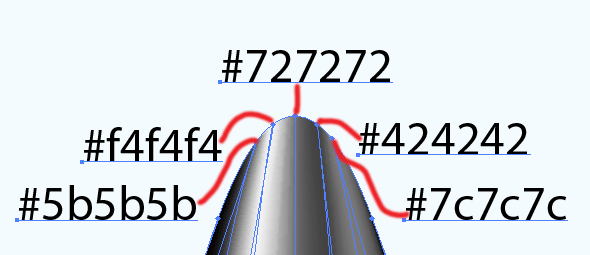
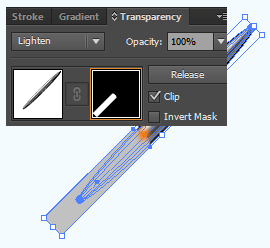
The lighting on the brush handle is completed, select the handle and go to right click > Transform > Rotate, put value 40 to change the angle. Now apply steel cover on front, draw a rectangle shape and change the angle "40o" then put on the brush front. Select anchor point by Direct Selection tool and move a little bit up as circle curve, Open Transparency Panel (Shift + Ctrl +F10) and change the blend mode "Lighten".
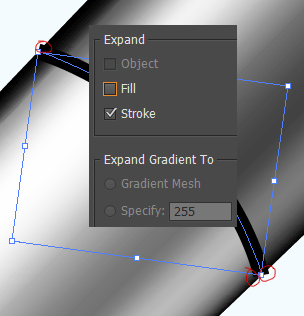
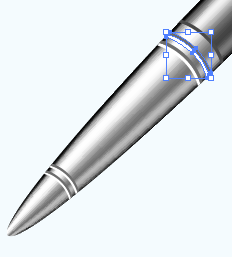
Let's make divider of steel cover and brush handle, select Pen tool (P key) and draw line only stroke color "Black" with "2px". Go to Object menu and choose expand, the line corner is out of brush handle so select anchor point by direct selection tool and adjust the position on the handle as showing by the red circle.
Still selected make duplicate layer move down and change color "#6d6d6d", make duplicate one time more and move a little bit with changed color "White". Apply same process to make three more and adjust as below picture.
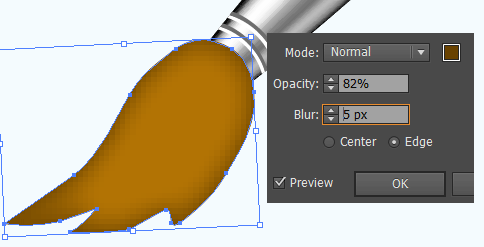
Now going to draw brush, select Pen tool and draw a shape like brush with only fill color "#b27304". Go to Filter menu > Stylize > Inner Glow and adjust the value.
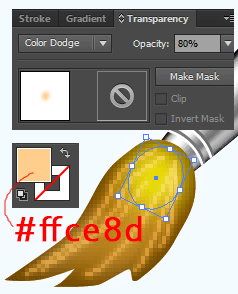
Select pen tool and draw some line with stroke color "yellow" and apply "2.5" blur by go to Filter menu > Blur > Gaussian Blur. Select Ellipse tool and draw an oval shape with fill color then apply blur as applied on lines, Open Transparency panel and change blend mode "Color Dodge" with opacity "80%".
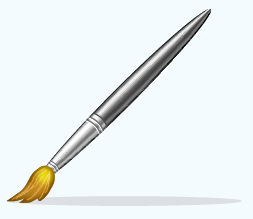
The brush is completed.
Santosh Kumar
This is santosh kumar living in New Delhi (India) and love to work as a Web & Graphic Designing. I like to create sketch, background, illustration and vector graphics. Tutorialbunch.com is a very good place where I express my creativity.
|