|
Line Throbber Loading Icon
In this tutorial I am going to teach you about to create a throbber line loading icon in Photoshop cs6, you would have seen it on many website and UI design to show loading process. It is not quite easily, you have to sharp focus on every step in this tutorial. You will learn more about masking effect so let's start.
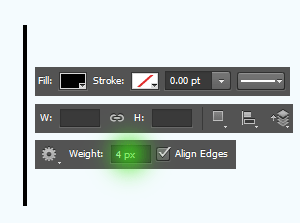
Take a new document with any size as you required but make sure the background should be "Transparent", select Line tool (U key) and make adjustment in the optional bar then hold shift key and draw on the canvas with black color.
We should have more thick line to make complete moving it roundly, still selected line layer press Ctrl + J key to make duplicate, press Ctrl + T key to transform and rotate "10o" in the optional bar as done below picture.

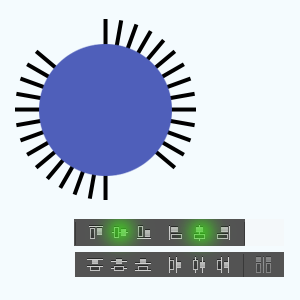
Apply same upper step to make more line like this picture, select all the line layer and right click then choose "Merge Layers" option. Select Ellipse tool (U key) and draw little circle with hold shift key. Make both in the middle position, select both shape by hold shift key and make adjustment in the optional bar as green spot.
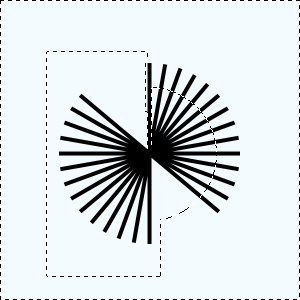
You have to cut a small part of the line picture, hold Ctrl + mouse click on the circle layer thumb to make selection and hide the layer then come on the line layer. Select Rectangular Marquee tool (M key) and hold shift key then apply half portion from left side, you have made perfectly but we have to take a little bit wide one line of them. Hold Alt key and apply on that line to deselect, press Ctrl + Shift + I key and apply "Add Layer Mask".
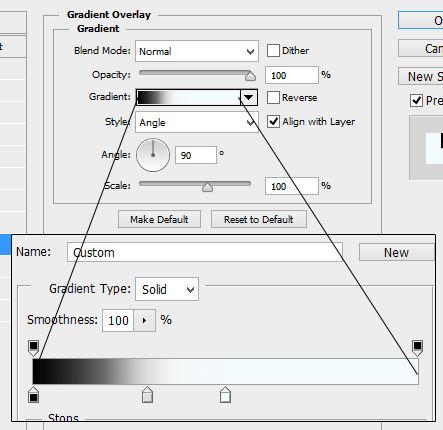
Now you have a small cut line layer and going to apply gradient effect on, select Ellipse tool and draw a circle with hold shift key as cover the lines then make both middle as done up. Apply gradient color in the circle by following this path, go to Layer menu > Layer Style > Gradient Overlay and make same settings as given here.
Still selected gradient circle layer right click and choose "Convert to Smart Object" then again go to and choose "Create Clipping Mask". Select both layer and right click then choose "Convert to Smart Object". It is completed your small cut line picture and ready to animate.

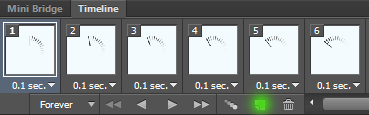
Open timeline for the animation effect, go to Window menu and choose "Timeline", hide all the line layer and come to the first layer. On the first frame unhide the first layer and click on "Duplicate Selected Frame" as showing green spot then hide first layer and unhide second layer. Do apply same step till the separate your all the layer on separate frame. Select all the frame with hold shift key and click on the "Select Frame Delay Time" then choose "0.1 sec". You can apply any of them as you like.
This is the final result of line loading icon.

Santosh Kumar
This is santosh kumar living in New Delhi (India) and love to work as a Web & Graphic Designing. I like to create sketch, background, illustration and vector graphics. Tutorialbunch.com is a very good place where I express my creativity.
|