|
Bath Soap
Today, I am going to create an orange colored bath soap and interested to share with you all. It is very interesting to draw; I have used some Photoshop tools like brush and layer style. I have mentioned here all the required steps to make complete this graphic, you just have to follow and learn yourself.
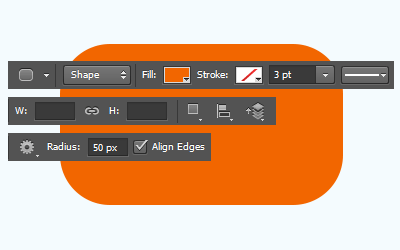
First take a new document with any background color as you like, select Rounded Rectangle Tool (U key) and draw shape on the canvas with orange color, you can apply any color.
In this step you have to modify the shape, select Pen Tool (P key) and click in the middle on the top of its horizontal edge. Pull up little bit by arrow key and adjust the left and right anchor point to make complete shape then apply same step on the bottom horizontal line as shown by blue spot.

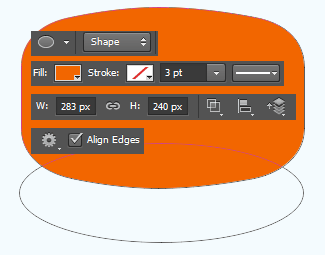
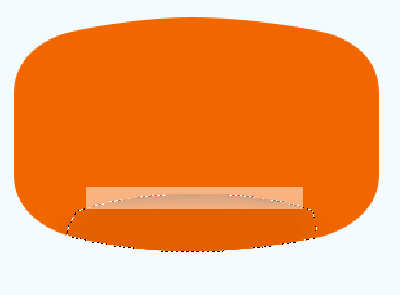
Make duplicate layer, select Ellipse tool (U key) and make same setting in the optional bar, draw an oval shape on the bottom as give below picture.
Still selected upper shape layer do right click and choose "Rasterize Layer" option, hold Ctrl and mouse click on the layer thumb to make selection. Choose Brush tool and make its settings, apply in the middle of the selection.
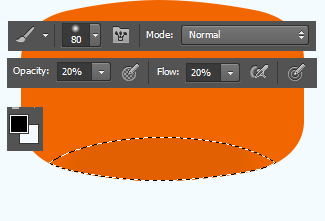
Still selected brush tool and change few settings (opacity and flow), you have a small size of brush as the selection area and you have to apply around the upper selection edge as on white spot. You get the shadow effect on.
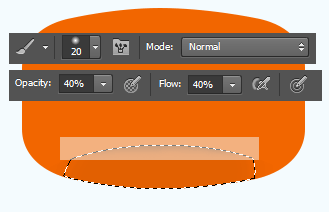
Still selection and brush tool, make inverse selection (Ctrl + Shift + I) key then apply horizontally on the white spot but this time the brush's color should be white.
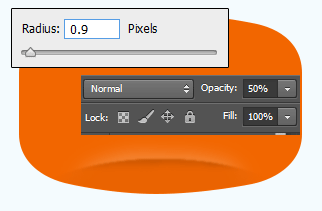
Now select both layer and do merged them, go to Filter menu > Blur > Gaussian Blur and put radius "0.9"px then reduce the layer opacity "100%" to 50%.
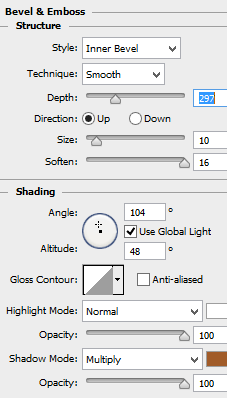
Make duplicate and right click then choose "Flip Vertical", move up and set on the top. It is time to work on main area, come to big shape layer. Go to Layer menu > Layer style > Bevel & Emboss and apply same settings.
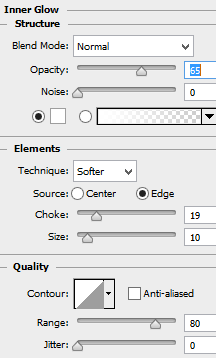
In this step I am going to apply glow inside the soap, go to Layer menu > Layer style > Inner Glow. Change the color and settings as given below picture.
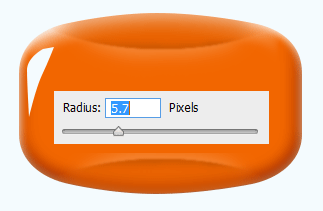
Now create light spot on the soap, select Pen Tool (P key) and make a selection. Take a new layer and fill white color, go to Filter menu > Blur > Gaussian Blur and put radius "5.7px", make duplicate layer.
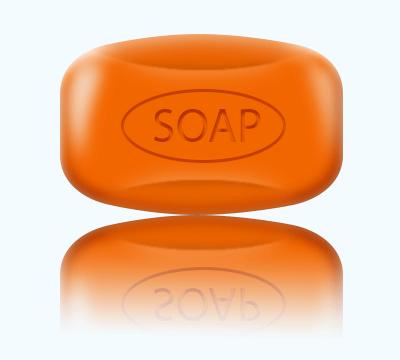
Apply it on apposite site of the soap, the soap is completed. I am giving you a job to type any think on the soap.

This is the final result.
Santosh Kumar
This is santosh kumar living in New Delhi (India) and love to work as a Web & Graphic Designing. I like to create sketch, background, illustration and vector graphics. Tutorialbunch.com is a very good place where I express my creativity.
|