|
Company Logo
This tutorial will guide you how to create a any type of logo that can be used as
a company logo and sure you get a new ideas to create it on different mode of the
logo to make it own during following this example.
Start this example with a new document, adjust the size as your project required
and select Ellipse tool (U key) and create circle with "#071842"
color.

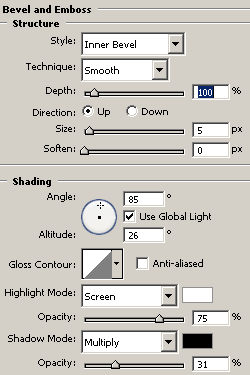
Now apply bevel effect on the circle by following this path (Layer menu >
layer style > Bevel and Emboss) and adjust all the settings as done below
picture.
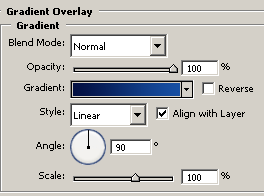
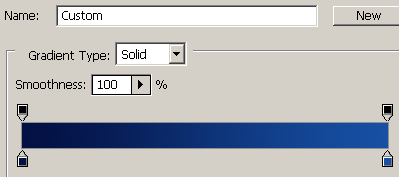
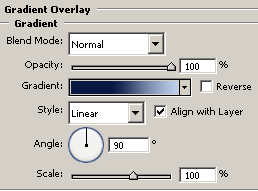
Apply gradient color in the circle by following this path (Layer menu >
layer style > Gradient Overlay) and select gradient color as done below
picture.

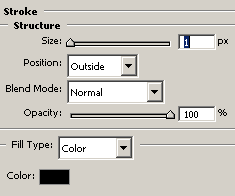
Show stroke color on the circle by following this path (Layer menu > layer
style > Stroke) and select stroke color with selected size "1px".
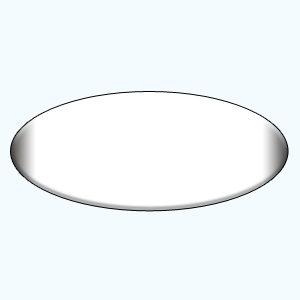
The logo should be same as here.
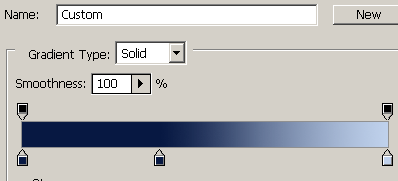
Make duplicate layer of the circle and press Ctrl + T key to reduce size then
set in the middle of the logo and change the gradient color by following upper
gradient path as done below.
The logo should be same here.

Make duplicate circle again and reduce the size then set in the middle of the
circle after that apply different gradient color that is given below.
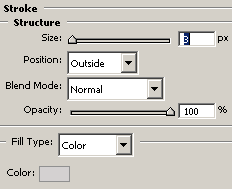
Now apply stroke on the circle by following this path (Layer menu > layer
style > Stroke) and select stroke color as done below.
The logo should look like this.

Come back to Maine logo circle and hold Ctrl key + mouse click on the
thumbnail of the circle layer to make selection then select Elliptical marquee
tool (M key) and draw a circle from bottom side of the circle with hold Alt key
to cut the selection. The selection should be same as done below picture.

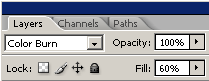
Now take a new layer and fill the black color by the Paint bucket tool (G
key) in the selection and change the blending mode of the layer as given below.
You should have this type of button.

Select Text tool (T key) and type any text with shadow as you want to give
company name that is your final logo.

Santosh Kumar
This is santosh kumar living in New Delhi (India) and love to work as a Web & Graphic Designing. I like to create sketch, background, illustration and vector graphics. Tutorialbunch.com is a very good place where I express my creativity.
|