|
Wine Bottle
Hi Friends
Today, we are going to learn how to create a wine bottle by this example in photoshop, it has a simple technique and that is described by some appropriate steps. We have done it by using carefully Pen Tool, Brush Tool, gradient color and layer style; it will sharp your tool knowledge. Follow this example without loose any movement and try to reach on the final effect, I am sure you will like and enjoy this tutorial.
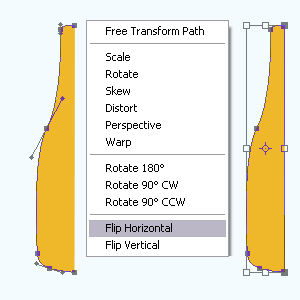
Start with a new document, adjust the size of the document as you required. Select Pen Tool (P key) and draw a half shapes of the bottle. Select Direct Selection Tool (A key) and hold Alt key then move right side to make duplicate copy. Now right click on copied bottle and choose "Flip Horizontal" option then joint both shape.
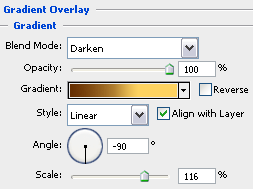
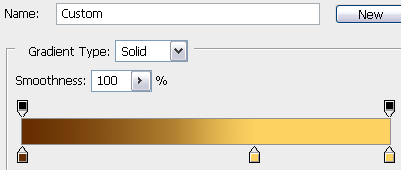
Now apply gradient color in the bottle shape, follow this path (Layer menu > Layer Style > Gradient Overlay). A window come on the screen and chooses color on the gradient drop down menu then applies another settings.
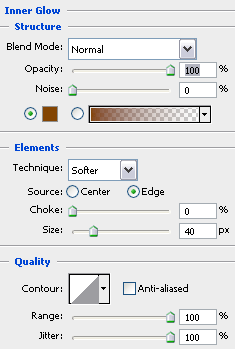
Still selected bottle layer apply glow inside by following this path (Layer menu > Layer Style > Inner Glow), select "#834401" color and make all the adjustment as done below picture.
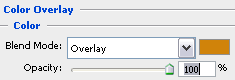
Now I am going to apply a color on the whole bottle, follow this path (Layer menu > Layer Style > Color Overlay). A pop up menu appear on the screen and choose color "#d0830a" and change the blend mode "Normal" to "Overlay".
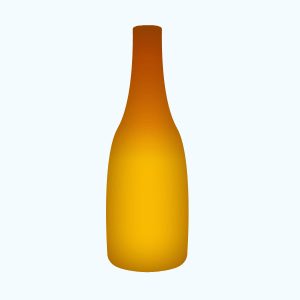
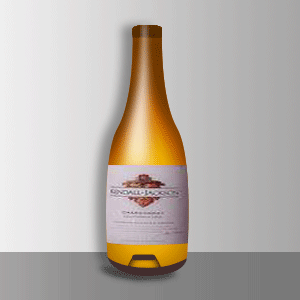
The bottle should be look like this.
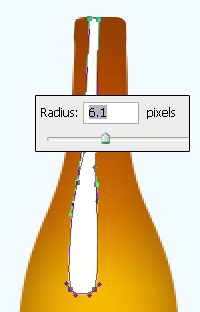
In this step I am going to apply a light effect on the bottle, select Pen Tool (P key) and draw a shadow shape on the bottle with White color. Right click on the layer and choose "Rasterize Layer" and apply blur effect by follow this path (Filter menu > Blur > Gaussian Blur) and put Radius "6.1".
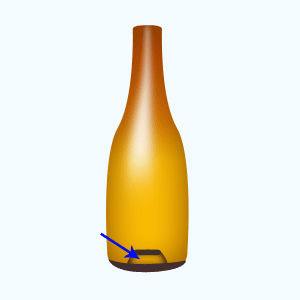
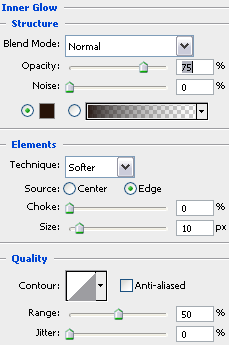
Select Pen Tool (P key) and draw shape on the bottom of the bottle with "#f9ba03" color then follow this path (Layer menu > Layer Style > Inner Glow). A window come on the screen and makes all the adjustment as done below picture.
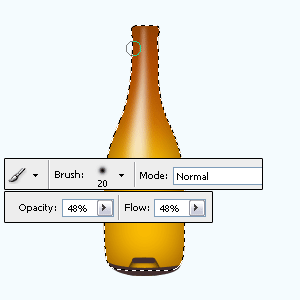
Select Brush Tool (B key) and make setting in the option bar (If the option bar is not showing, go to window menu > Option), hold Ctrl key and mouse click on the bottle layer thumb to make selection then apply brush tool on the bank of bottle as given below.
Make sure the bottle should be look like this, now you have to stick a company label so copy paste on the bottle and adjust the position. Come to bottle layer and make bottle selection then press (Shift + Ctrl + I) to make inverse selection and press Del key.
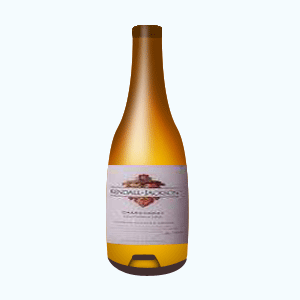
Apply any background as you need, I have used a simple background that is final result.
Santosh Kumar
This is santosh kumar living in New Delhi (India) and love to work as a Web & Graphic Designing. I like to create sketch, background, illustration and vector graphics. Tutorialbunch.com is a very good place where I express my creativity.
|